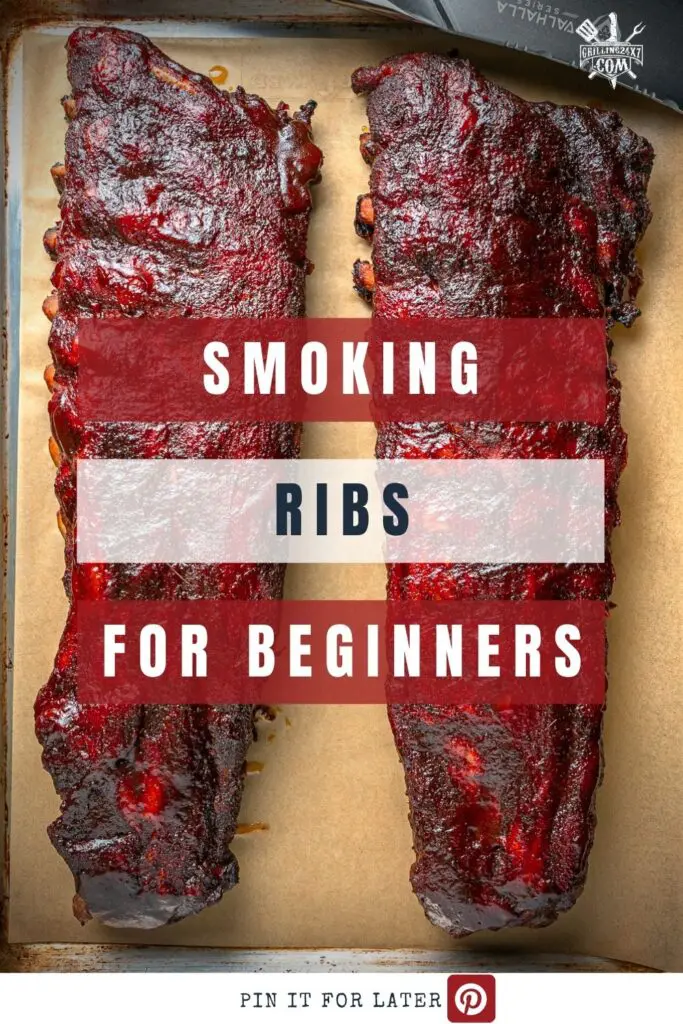
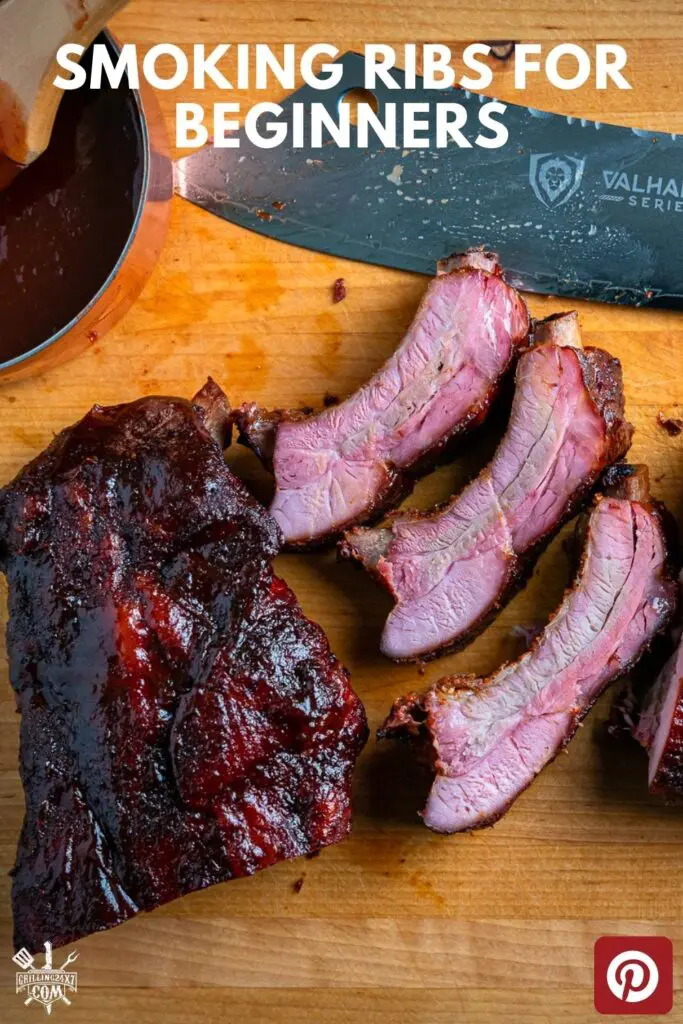
Smoked Pork Ribs For Beginners
This Tried and True Smoked Rib Recipe has been perfected over many years and countless backyard cookouts so I can share all the secrets for perfectly smoked Ribs.
My blog followers and thousands of social media followers enjoy making my recipes because I provide clear, honest, and easy-to-follow instructions. This makes my blog a reliable source for all BBQ lovers.
Why My Recipe Is The Best
After opening multiple BBQ Restaurants and competing all over the East Coast, these Ribs have years of culinary know-how behind them to ensure your BBQ ribs are the best around.
I will put my pork ribs up against the best pitmasters in the country, and after you make them, you will be able to say the same. Don’t Have a Pellet Grill yet? Try this Slow Cooker Rib Recipe
Ingredient List
- Pork Ribs: You can use Baby backs or St Louis Spare Ribs
- BBQ Dry Rub: You can buy your favorite store bought rub or experiments making your own spice blend.
- Yellow Mustard: this is a controversial ingredients. You only enough to coat the ribs so the dry rub will stick better. You can also use oil, Hot Sauce or mayo as a binder.
- Squeeze Butter (Margarine): This is the secret ingredient the pros on the competition circuit use. It adds a salty buttery flavor and is easier to work with than real butter. Parkay in the blue bottle is my brand of choice.
- light brown sugar: Brown sugar adds sweetness but also helps develop that deep caramelized color of the smoked ribs.
- Honey: I love to use a tasty local honey but use whatever you have available.
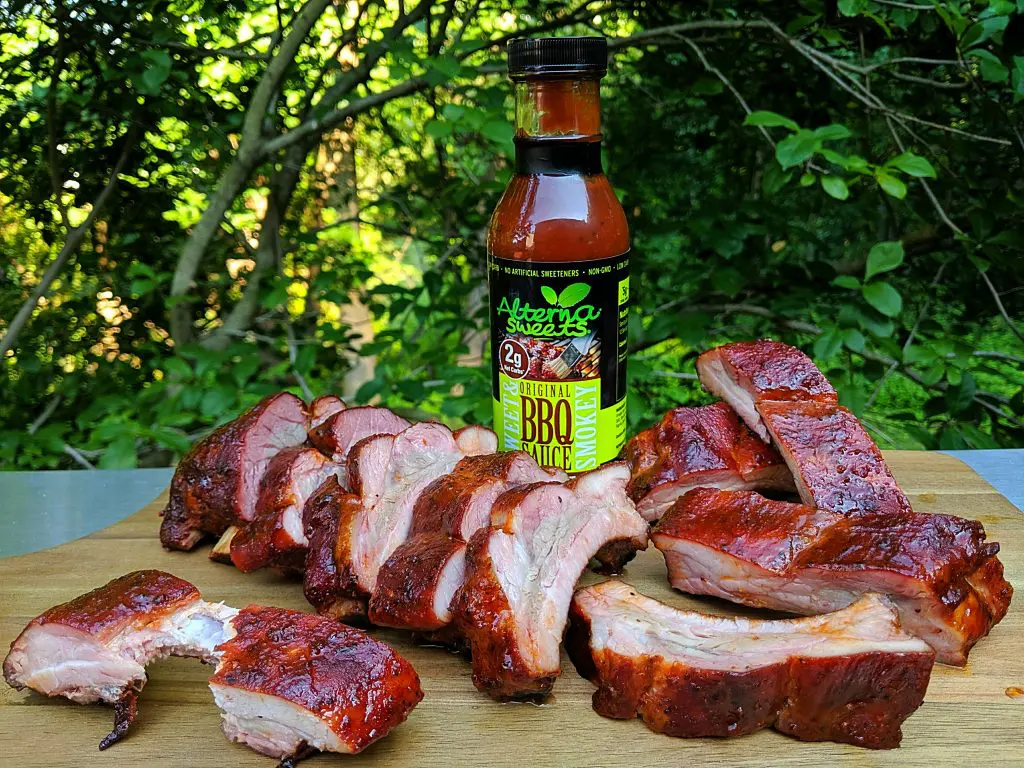
- BBQ Sauce: There are so many choices out there. You can make your own but I recommend buying a sauce the first few times until you have a sauce you really love.
What Type of Ribs Should You Buy?
There are different cuts of pork ribs, but the most common are Spare Ribs, St. Louis-style ribs, and Baby Back Ribs (also referred to as Loin Back Ribs).
- Spare Ribs: These are the largest of the three because they are cut from the broad side of the pig and are not trimmed much. They are the classic OG pork rib, but they require some trimming and have cartilage attached to the rib tips.
- St Louis-style ribs are Spare ribs that have been trimmed down to a uniform, squared-off shape and have the rib tips removed. Most competitors use this rib type because it makes for a super juicy rib with plenty of meat on the bone.
- Baby Back Ribs are cut from the undercarriage next to the pork loin and have a curved bone. They are smaller but still can have plenty of meat. However, they have less fat and can dry out if you overcook them. If I’m making ribs at home for the family, I personally love cooking baby backs because they are tender, juicy, and just a great eating rib.
Prepping the Ribs
- Anytime you are smoking a full rack of ribs, you will want to remove the membrane attached to the underside of the ribs. The best way is to work your finger between the third and fourth bones on the rack, separating the membrane from the meat.
- If you are having trouble gripping the membrane, use a paper towel.
Once you have separated the membrane for that one bone from top to bottom, grab the membrane and pull it up. It should come off in a single pull from the entire rack. - If it tears, get another grip and remove the remaining membrane. It takes a little practice, but you’ll be a master in no time. After that, the ribs are pretty much ready to go. If you see any large pieces of fat or a bone fragment, go ahead and trim those off before seasoning.

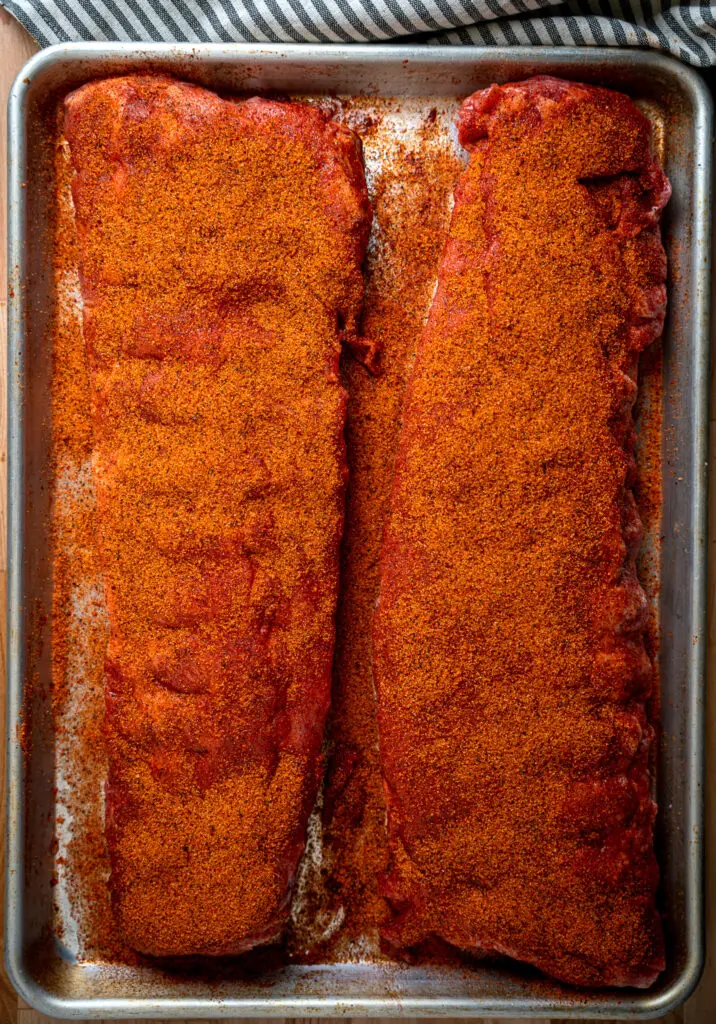
Seasoning
- There is no right or wrong way to season the ribs. It’s all about what flavors you prefer. Some people like a sweet rib rub with lots of brown sugar, while others prefer a spicier rub with cayenne pepper, garlic powder, and other spices.
- I recommend seasoning the ribs at least 30-45 minutes before you intend to smoke them, making sure to season the sides. You can do it the night before, but keep the ribs refrigerated until it’s time to cook. This will give you a better smoke ring.
- Once you pick your dry rub out, you will want to brush it on a binder to help the rub stick to the ribs. Most people use yellow mustard, while others use olive oil, mayonnaise, or hot sauce. You only need a few tablespoons per rack of ribs, and I have found that you cannot even taste it, so use whatever binder you like.
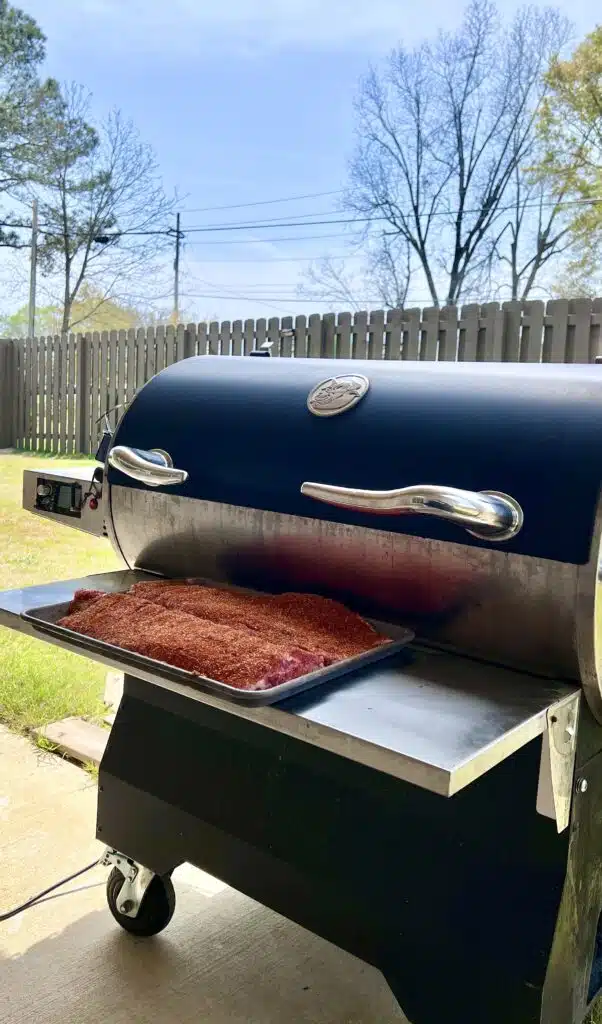
What Temperature Is Best for Smoking Ribs
- The best temperature to smoke ribs is 250 degrees F. You can go as high as 275 degrees or as low as 225 degrees, but 250 degrees is the sweet spot.
- If you smoke the ribs too low, they will take on too much smoky flavor and take forever to cook. On the other hand, if you smoke them higher than 275, the ribs will get little smoke and will be more of a grilled rib.
Smoking The Ribs
Now that the smoker has heated up place your ribs on the pit meat side up. You can place them anywhere on the pit, but avoid putting them directly over the heat source.
Close the lid and let them smoke for 2 hours; don’t open it—no Peeking. This is when the ribs will develop most of their flavor as the rub caramelizes on the meat.
After 2 hours, you can check the ribs and see if they have any dry spots. Spray the ribs with cooking oil to keep them moist. Continue to cook for another hour.
Wrapping
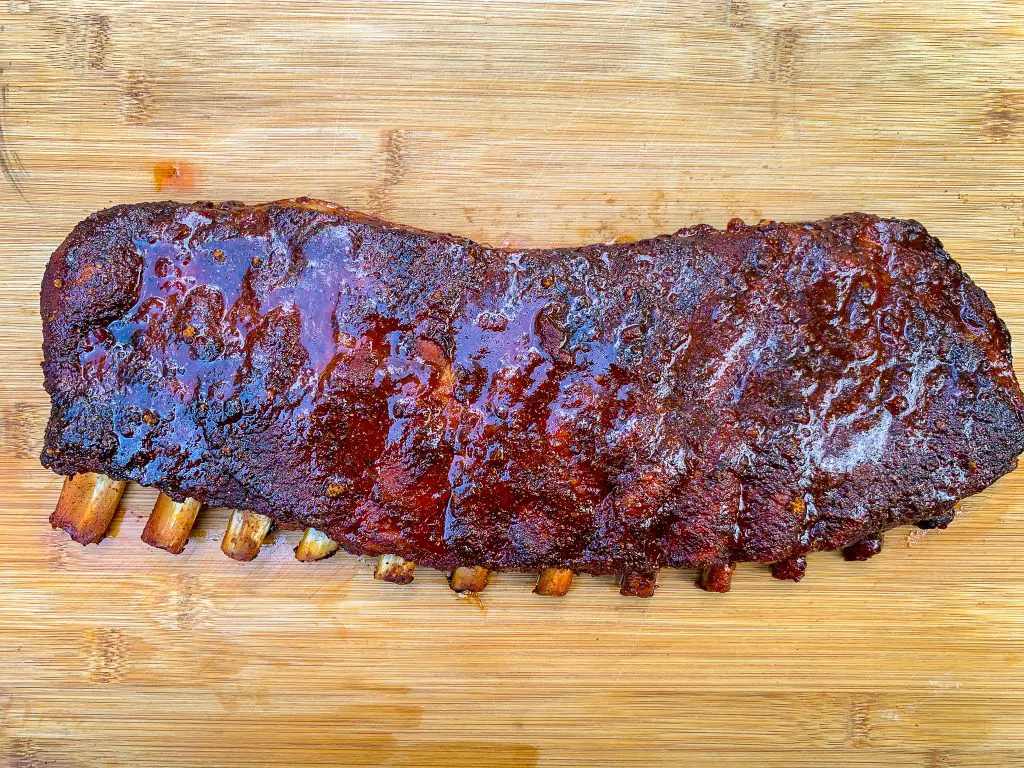
After about 3 hours, the ribs have absorbed all the smoke they can, and the rub should be caramelized onto the ribs. Gently brush your finger across the top of the ribs.
The rub should stick to the rib without smearing off. If it doesn’t, continue smoking, unwrapped for another 30-45 minutes.
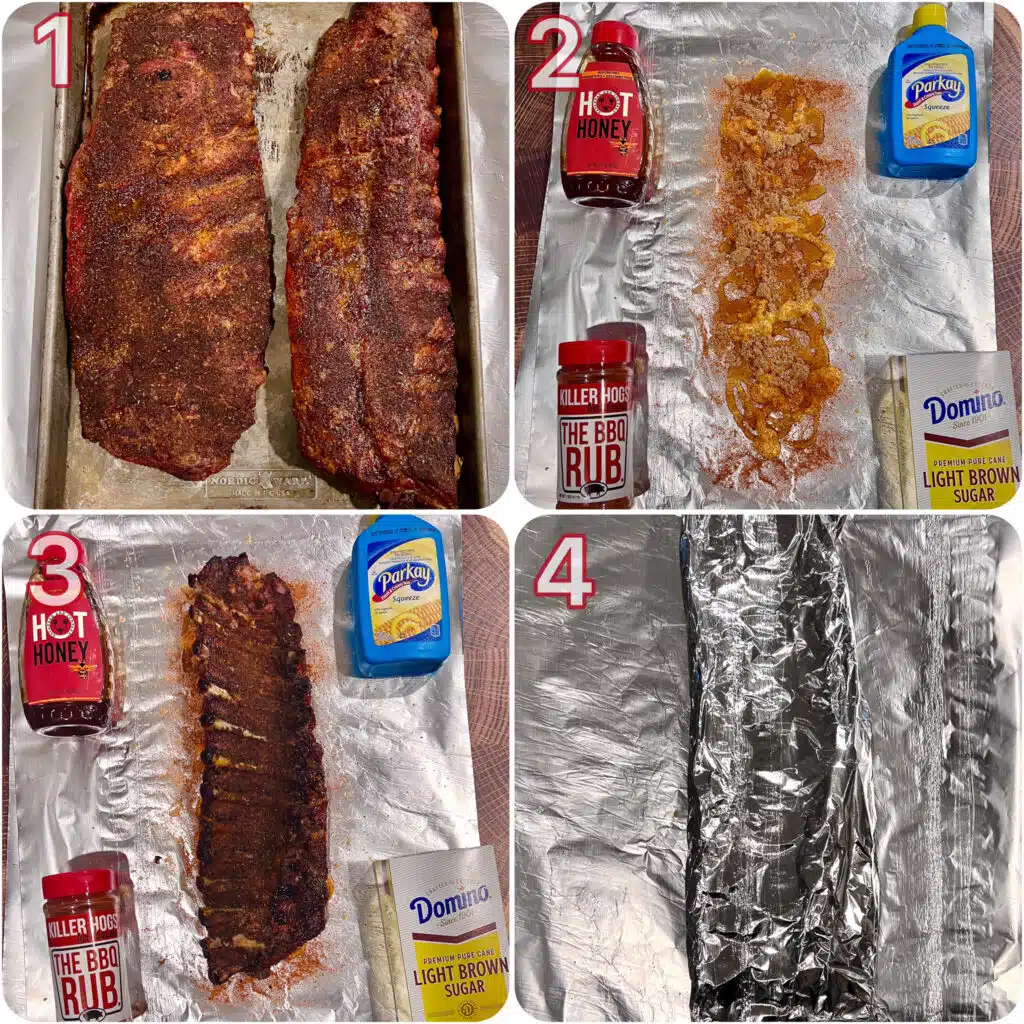
To wrap the ribs, you will want to use heavy-duty aluminum foil. Tear off a sheet about twice the length of the ribs and lay it out with the dull side facing up.
I drizzle some squeezed butter, honey, brown sugar, and additional rub down onto the foil, then place the ribs meat side down onto the foil, fold in the wide sides tightly, and roll up the ends tight.
Place the baby back ribs back on the smoker and cook for about 1 hour or 90 minutes for Spare/ St. Louis ribs.
I make the decision when to wrap my ribs based on two factors: color and temperature.
- Color: If I’m happy with the color of the ribs and how the bark looks, then I may decide it’s time to wrap to maintain that color and not darken the meat any further.
- Texture: The second factor is temperature. Because it is around 160-170 degrees F, the ribs take on all the smoke they can, and it’s time to wrap so that the meat can choke up on the bone and become more tender.
How do you tell when the Ribs are done?
Remove the wrapped ribs from the smoker and gently unroll the foil’s sides. Use a probe thermometer to poke at the meat between the bones. It should go in and out without any tension.
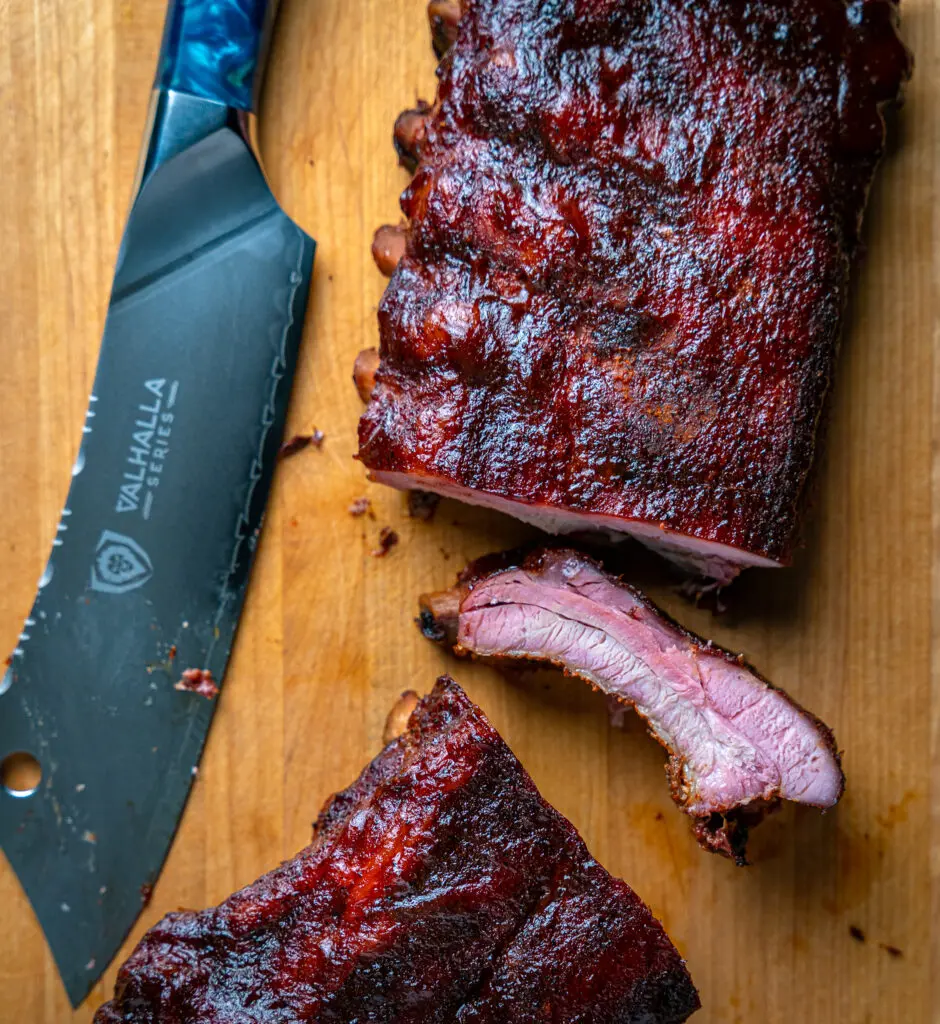
Look for the meat to be choked up on the bone about ½ inch. The internal temperature should be right around 200-203 degrees F.
Some folks use the Bend test, where you pick up the rib rack with tongs and let it bend. If the ribs bend but don’t break, they are tender but not overcooked.
If the rib meat doesn’t seem tender, wrap it back up and cook for another 30-45 minutes. If it is tender, roll up the sides of the foil to form a boat around it to keep all the juices in the foil.
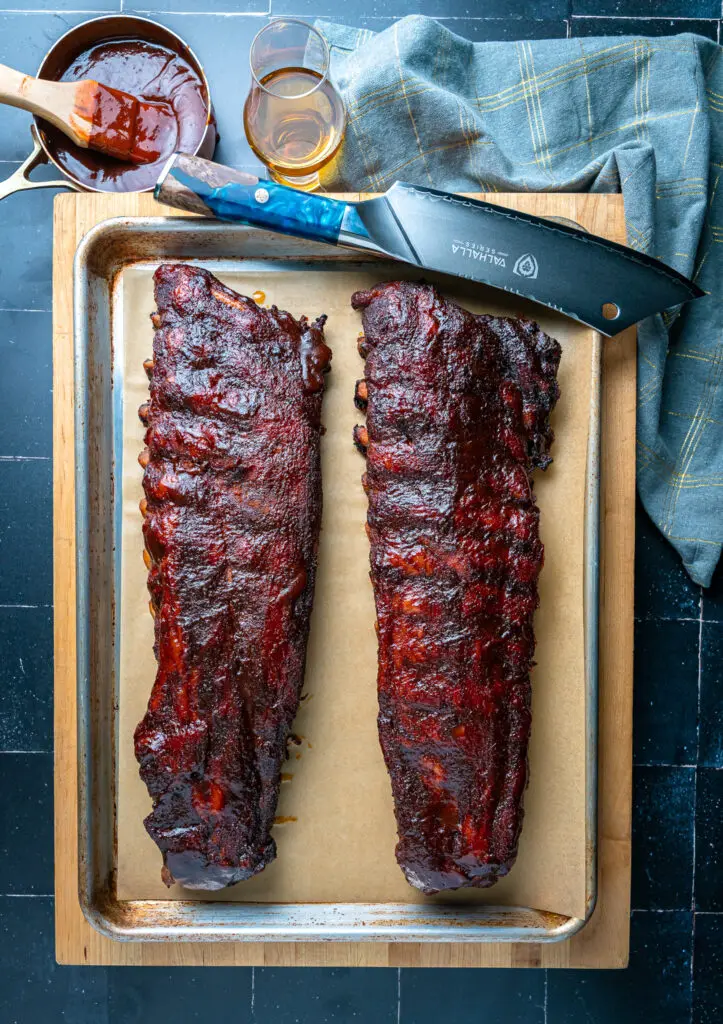
The ribs should be meat side up, and now it’s time to sauce them.
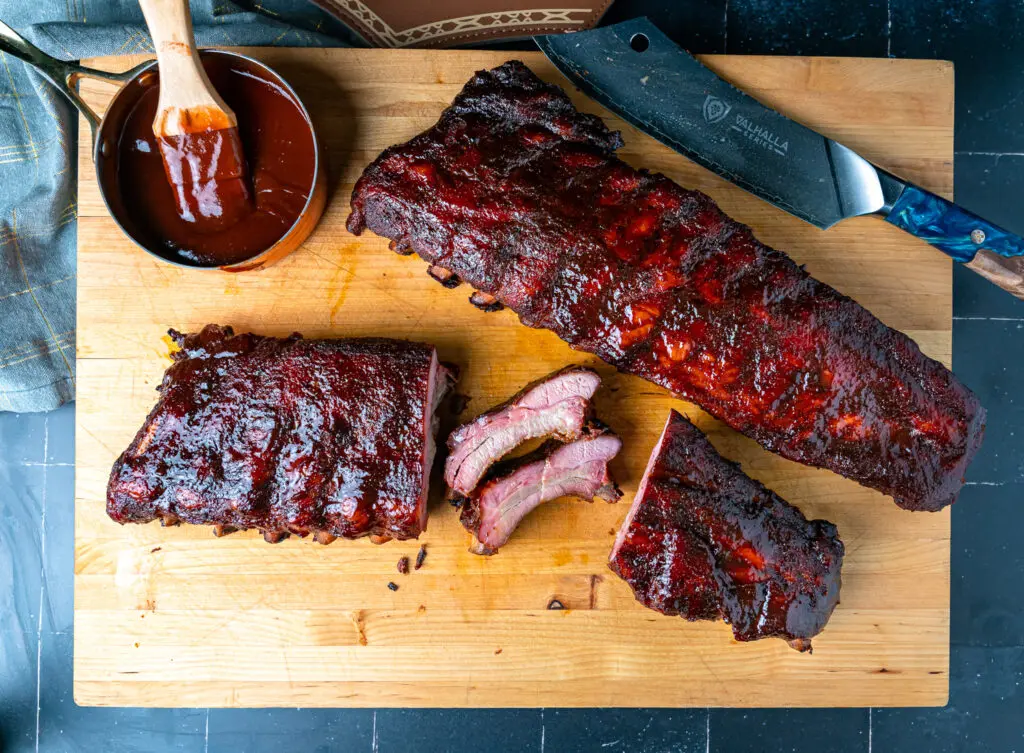
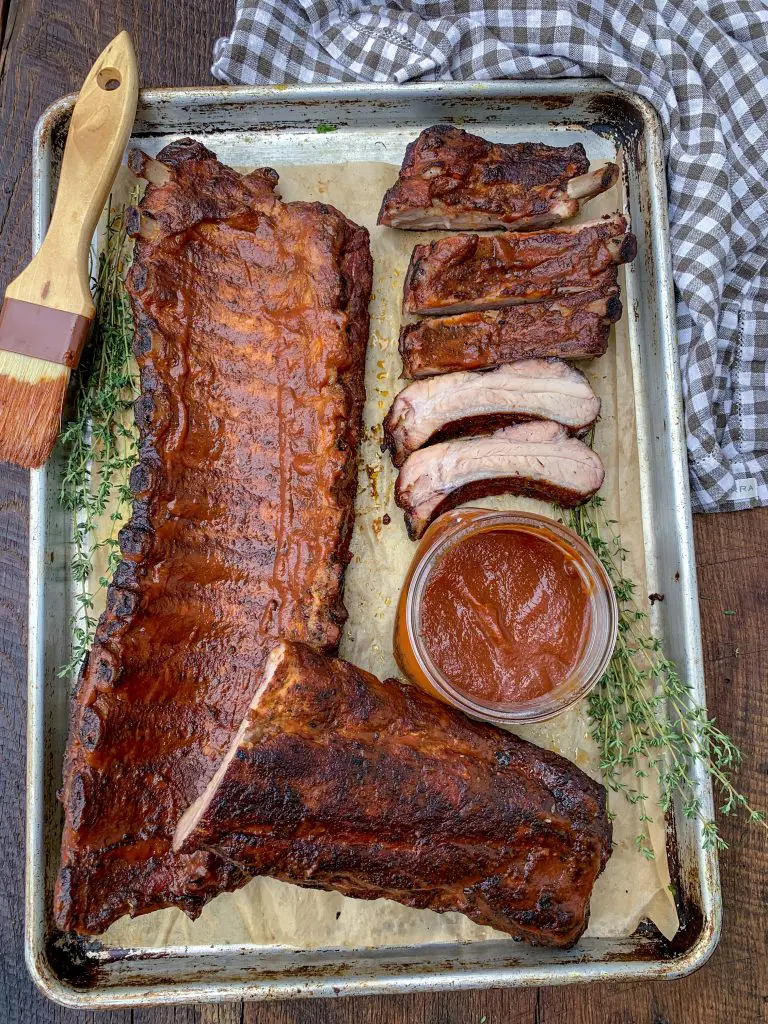
Saucing and Slicing
We are in the home stretch now, and there are just a few more steps before you devour the best ribs on the block. You’ve got the ribs tender and juicy; now we need sauce.
Place the ribs on a cutting board and grab a sharp knife. If this is your first time slicing ribs, I recommend placing them meat side down so you can see where to slice in between the bones. Once you get the hang of it, you can slice them meat side up.
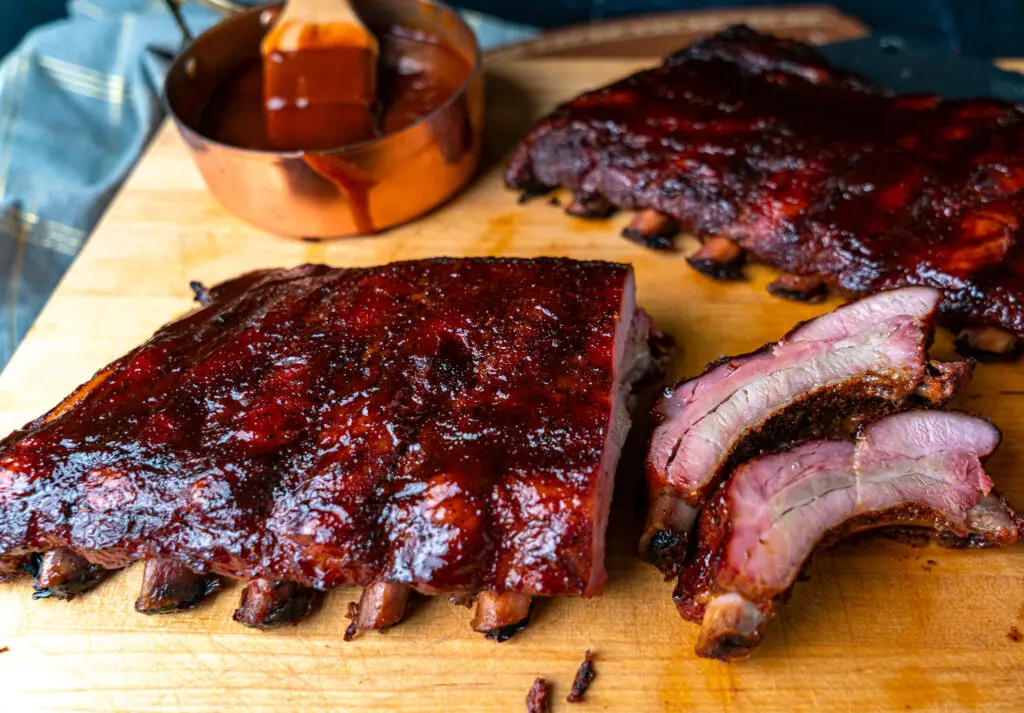
I like brushing on a very light coat of barbecue sauce and setting it up before adding another layer every 15 minutes for three coats. After applying the final coat, cook for 15 minutes before removing the ribs from the smoker.
Helpful Tips
- If you end up with perfect smoked pork ribs the first time, then bravo to you, my friend. If you don’t, please don’t be discouraged.
- Almost every pitmaster or backyard BBQer I know has messed up just as many ribs as they have perfected. Over time, you will learn that each smoker cooks differently.
- Whether you’re using an offset stick burner, a ceramic smoker, or a pellet grill, each has a distinctive personality with hot spots and erratic tendencies.
- Take the time to learn your smoker. Learn the ideal smoking rib temp for your smoker. Make mental notes. Hell, I know plenty of people who journal. Each cook takes notes on the weather conditions.
- Times, temperature, and ingredients used for each cook. Look at each rack of ribs before cooking. Are they meaty and thick or seem thin and smaller than normal?
- Analysis of the pork ribs before cooking will help you make the necessary adjustments as you cook.
How long does it take to smoke ribs?
When Smoking Ribs, you are looking for an internal temperature of around 200 degrees F. This will give you a tender rib that is still juicy and delicious. You can cook the ribs a little longer, around 205-210 degrees F, for completely fall-off-the-bone ribs.
The time it takes to smoke ribs will vary greatly depending on their size and the weather outside. For a small rack of baby back ribs, plan on 3-4 hours. A large rack of spare ribs can take as long as 6 hours.
I’m sure you have seen the 3-2-1 rib cooking method, which is a good method, especially for Smoking Ribs for Beginners, but don’t think of this as a hard number to stick to.
The size, thickness, and type of ribs will affect your cooking time greatly. Always cook by the look and feel over time and temperature. Use times and temps as markers to check your meat and lose guidelines.

FAQ
There are lots of good choices. The most popular wood pellets for ribs are apple, cherry, hickory, or oak. I like to buy a blend so you can get notes of different types of wood.
Sure, but like anything, you can have too much of a good thing. The longer the ribs cook, the more tender they will be and the less juicy they will be, so finding a balance of juicy and tender is important.
Generally, pork ribs of any kind will be done between 200-205 degrees F.
This is a popular method of cooking ribs for beginners. The idea is to smoke the ribs for 3 hours, wrap them for 2 hours, and then unwrap and sauce them for 1 hour.
More Recipes You Will Love
PIN this recipe and share it with someone who loves smoked pork ribs!!
How To Smoke Pork Ribs
Equipment
- Smoker or Grill
Ingredients
- 6 lbs Pork Ribs St. Louis or Baby Backs (2 Racks)
- 1/4 cup Yellow Mustard
- 1/3 cup BBQ Dry Rub
- 6 tbsp Squeeze Butter Margerane
- 4 tbsp Honey
- 1/2 cup Brown sugar
- 3/4 cup BBQ Sauce
Instructions
- Preheat your smoker to 250 degrees F.
- Trim the ribs and remove the membrane from the back side of the rack. Brush a light coat of mustard on both sides and season liberally with a dry rub. Refrigerate for 30 minutes, and place ribs on the pit.
- Place the ribs on the smoker, and don’t open the door for 3 hours. This is when the ribs will absorb the most smoke. Check the ribs to see if a bark has developed. If your rub has adhered to the meat, gently spray your ribs with cooking spray.
- If you’re happy with the color and the meat has an internal temperature of 160-170 degrees F., it's time to wrap the ribs.
- Lay the ribs down on the foil bone side up. Drizzle honey, squeeze butter, brown sugar, and dry rub. Wrap the ribs up tight and return them to the smoker. Continue smoking for another hour.
- Gently unwrap and probe the meat. Generally, ribs are ready to eat at an internal temperature of 200-210 degrees F depending on personal preference. More important than the temperature, use the probe thermometer to test for tenderness. Poke the meat in between the bones to see if the ribs are tender. The probe should go into the meat with very little tension. If the meat still seems tough wrap the ribs back up and continue cooking for another 30-60 minutes and check again.
- Once the ribs are tender, you may serve them dry or sauce them. If saucing, unwrap the foil and fold it over to create a tray to hold the juices to sauce the top. Brush on a thin layer of sauce and smoke for another 15 minutes. Depending on how saucy you like your ribs, you can sauce a few times. Allow time for the sauce to adhere to the meat before slicing the ribs.
- When cutting the ribs, it’s easier to turn the rack upside down so you can see the bones better and make clean cuts. You may lose a little sauce, but you can always baste a little extra on top when you turn them over.
Notes
Nutrition
This post may contain affiliate links that will not change your price but will share some commission. Please read the Privacy Policy
No smoker…..No grill 🙁
Make my own rib rub…..
Bake mine in the oven on 350 for about 1.5 hours covered, then remove foil for another 5-10 minutes……..Is this the best temp or should I be baking them lower & slower?
Makin it work, I Love it!!
Ya’ll lost me at Squeeze butter Margerine….. It’s real butter or nothing. But why you putting butter in the wrap? Just wrap them put them back on.
Competition teams use margarine because it’s saltier and it melts evenly. Of course you can use real butter if you like. Butter or margarine keeps the ribs richness as the fat renders out of the meat
When I do ribs in the oven I go as low as 200 or 220 and go for about 4 to 6 hours but they turn out killer
Next time you should go over the type of wood/chips to use in your smoker. Some wood is to strong of smoke flavor. Fruit wood is best.
that’s fair, I like to use blends most of the time or even hickory or oak. Mesquite is about the only would I would try to avoid but that’s just my opinion
try a combination of cherry and hickory.
That’s a great flavor combo!!
Drop the temp to at least 275…it will take a bit longer but the meat will be more tender
Great tips to make the best ribs ever! Thanks!
Thank you, glad you found it helpful
Great tips, my ribs came out fantastic
Awesome walkthrough!
Curious, can you share the model of that Dalstrong cleaver?
you’ll have to checkout dalstrongs website. it was called a chef hybrid knife. It might have been a limited addition. Thank you for checking out the recipe!!
How long in the smoker after wrapping the ribs? Step 7 says if not done yet cook for “ another 30-60 min but never said how long after the initial wrapping.
normally 60-90 minutes depending on the size and thickness of the rack of ribs
Does it matter if I leave the ribs in a pan while they smoke or should they be right one grill
to get maximum smoke its best to have them on the grill. That said its not a huge difference and it can make clean up easier. Its up to you to decide which is more important for you.
This is great, trying it right now. Very step by step, however, some further clarification on terms would be very helpful. What is mop, I can surmise, but that is just an example. Things like “put some butter on the rack”…On the rack in the grill, or the rack of ribs, I know I am stupid, but for a total newbie at smoking, it would be helpful.
Thanks
Paul
I appreciate the feedback. Ill see if I can go back through and try to give better explanations. thank you
I’m the section of wrapping in foil or paper you say meat side up, but in the directions (#6) you say bone side up. Which should it be?
truthfully it doesnt make a huge difference but I do recommend bone side down. Ill check the blog and clarify. thank you
Fantastic article. Thank you for taking the time to list it all out. I think the most common mistake is that people panic when something doesn’t look right or one of the metrics is off (heat, smoke, rub amount or coverage etc). Your article is worth bookmarking!
Thank you!! glad you found it helpful
I have never wrapped my ribs, I have been using pecan wood for smoking and I used an offset for a while until I got my Kamado grill. I have typically been smoking them with a dry rub only for 4-6 hours depending on how they feel. The Kamado grill gives me much better control over temperature and I can keep it really low for a very long time. Sometimes the ribs need a bit more cooking after that, but I typically either wrap them and put them in the oven for a while, or just throw what I am going to eat right then in my airfryer for 15 minutes or so and that takes care of it.
Most of this I figured out on my own, but this recipe seems like a good starting point for most people.
For those with an offest you can get a much deeper crust. on a pellet grill I do like to wrap the ribs. Its all about what you like
Great recipe !!! This will be my 3rd attempt at pork ribs . Tough to please ,,, but they get better every time .
I love cooking , smoking ! My smoker never shuts off . Recipes are like shoes , they either fit or they don’t . I don’t use Recipes , I make it work . I have a BBQ sauce that I make , no measures for ingredients ! Dr pepper BBQ sauce !
Dr pepper ribs …
thats the beauty of smoking meats, You get to make little adjustments and play with new ingredients!!
At initial smoking is the bone side down or up?
meat side facing up
Just finished on my new Boss Pitt smoker. Awesome recipe! Thanks for the recommendation.
First time smoking. My son is a grill master and has shamed me into trying it. LOL Wish me luck.
I hope it went well, I apologize for not replying sooner.
My ribs came out great. I’ve had awesome ribs and multiple failures. What I really appreciated about your recipe is that you included meat temperatures. That was where I could see where I went wrong on the initial smoking by smoking too long. The 3-2-1 method is not always correct